Australian Low Budget & Indie Crew Agreements

Warning: You cannot contract out of the Requirements of Australian Employment Law and the National Employment Standards. Stop it!

Every low budget and indie production wants to know what agreement to work under. The common answer is the Motion Picture Production Agreement (MPPA). Sometimes referred to as the Motion Picture Production Certified Agreement. (MPPCA)

Aside: For truly indie non-commercial projects there is a way not to pay everyone involved. No, I'm not going to explain it publically because you goblins will abuse it. Get in touch if you want to discuss it. No, you won't like the process and I don't recommend it for most productions. 

But the MPPCA expired in 2013. The C stood for Certified. And certainly not Collective, I’m looking at you Screen Producers Australia. Now that it expired it is just the Motion Picture Production Agreement MPPA. Nothing about that agreement is certified anymore.

The other agreement you can use for motion picture production in Australia is BRECA the Broadcasting, Recorded Entertainment and Cinemas Award [MA000091]. This is the modern award and compliant with National Employment Standards.

The Media Entertainment & Arts Alliance is the union that represents Performers (the Actors Equity division) and Crew (Entertain Crew & Sport)

My opinion was SPA didn’t want MPPA any more, and MEAA wanted the Offshore Productions crew rates more than MPPA, neither has forced a deal.

MEAA increases their version of MPPA by the percentage that all awards are increased every year. SPA just increased their version by CPI minimum until BRECA caught up. SPA now increases their MPPA by whatever BRECA goes up by. The result is the discrepancy you see.

Reality is that BRECA now pays the same as SPA’s MPPA, and in some cases BRECA pays more. It is illegal to pay less than BRECA. So you can’t say “we’re paying SPA’s MPPA” and be 100% legal. You can be 100% legal with MEAA’s MPPA.

On page 5 of SPA’s version it says

If you are paying only minimums on an MPPCA contract, that also means that you are paying the Award (BRECA) safety net minimums. In this situation, you will need to consider the 5 BRECA provisions (in Part 13) that are different, potentially more employee-beneficial to ensure you provide terms and conditions no less than the Award:

  1. Any crew personnel starting work before 7.00am is entitled to a 25% loading on the Award hourly rate for each hour of work before 7.00am. Under the MPPCA, crew can start from 6am without payment of this loading.
  2. If crew personnel work ordinary hours between 8.00pm to midnight on a Friday night, you must pay a loading of 50% of the Award hourly rate for each of these hours. Under the MPPCA, this loading is 25%.
  3. Crew personnel starting work before 7.00am on Monday having performed work on either the Saturday or Sunday preceding, are entitled to a 100% loading on the Award hourly rate.
  4. Under BRECA, the employer can nominate the place of call within 25 km of the GPO in your capital city. If the place of call is outside the 25 km radius, then the employee is entitled to be paid travel time at an amount of two minutes for each kilometre of distance between the 25 km radius and the location, using the shortest practicable route by road between the employer’s usual place of business and the location. Under the MPPCA, the radius is 20 km but travel time outside that radius is 1 minute for each kilometre of distance beyond the radius. The MPPCA calculation is likely to favour the employee in this situation, but you should check this to ensure a minimum-pay employee is not disadvantaged.
  5. Under BRECA all casual crew must be paid no less than the minimum hourly wage plus a loading of 25% (rather than the lower MPPCA loading of 20%). 

FYI Casual crew are defined as Daily hires not Weekly hires.

The producers could schedule production to ensure they don’t fall foul of these traps.

I believe that if you can’t pay everyone according to SPA’s MPPA without lots of exceptions, and double checking a whole new award, it isn’t a reliable agreement.

Therefore there are only two choices for agreements to work under at the moment: BRECA or MEAA’s version of the MPPA.

NSW Public Holidays for Productions

I’ve updated the Dreamspinner Media – NSW Public Holidays calendar. It helps producers check public holidays as far out as they need.

It even has every Good Friday, Easter Saturday, Easter Sunday and Easter Monday until 2099. Plus it works out when the standard holidays generate an extra day because they fall on a weekend.

Details on how to download it or subscribe with your favourite calendar app are on the page https://dreamspinnermedia.com/nsw-public-holidays/

Hopefully SAG-AFTRA reaches a deal with SMPTP to allow productions for the major streamers to start up again. It’s been very quiet in Sydney during the strikes.

DIY Appleboxes

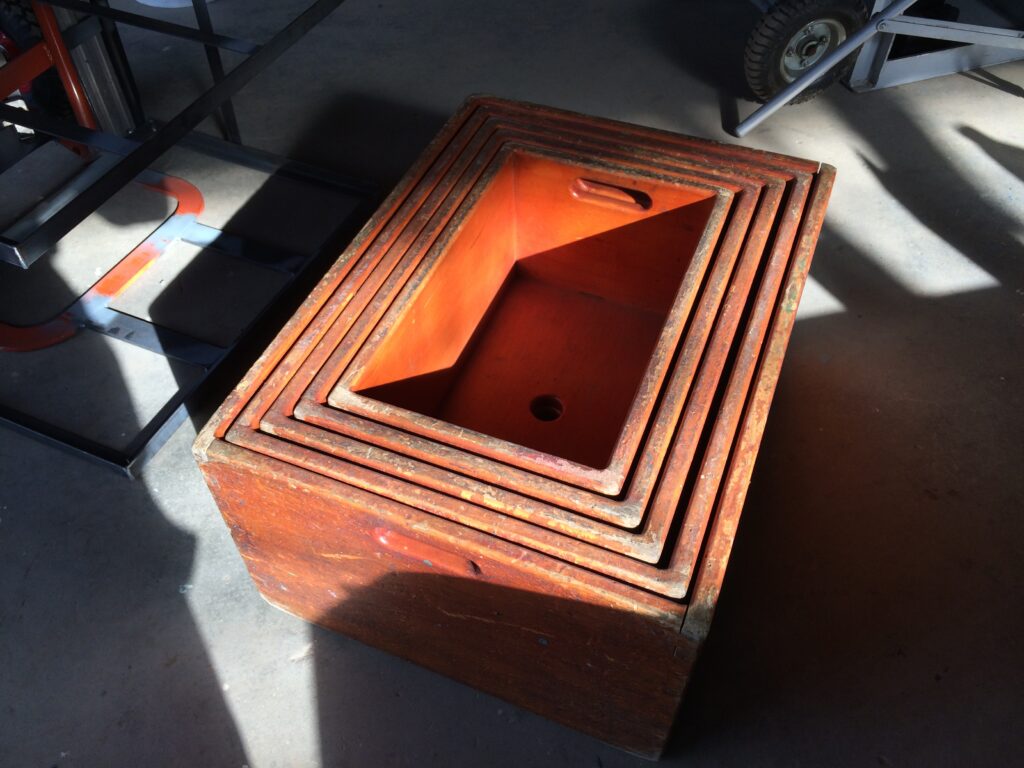
Baseline Digitial used to have plans for US-style apple boxes. Australian sets use nesting apple boxes.

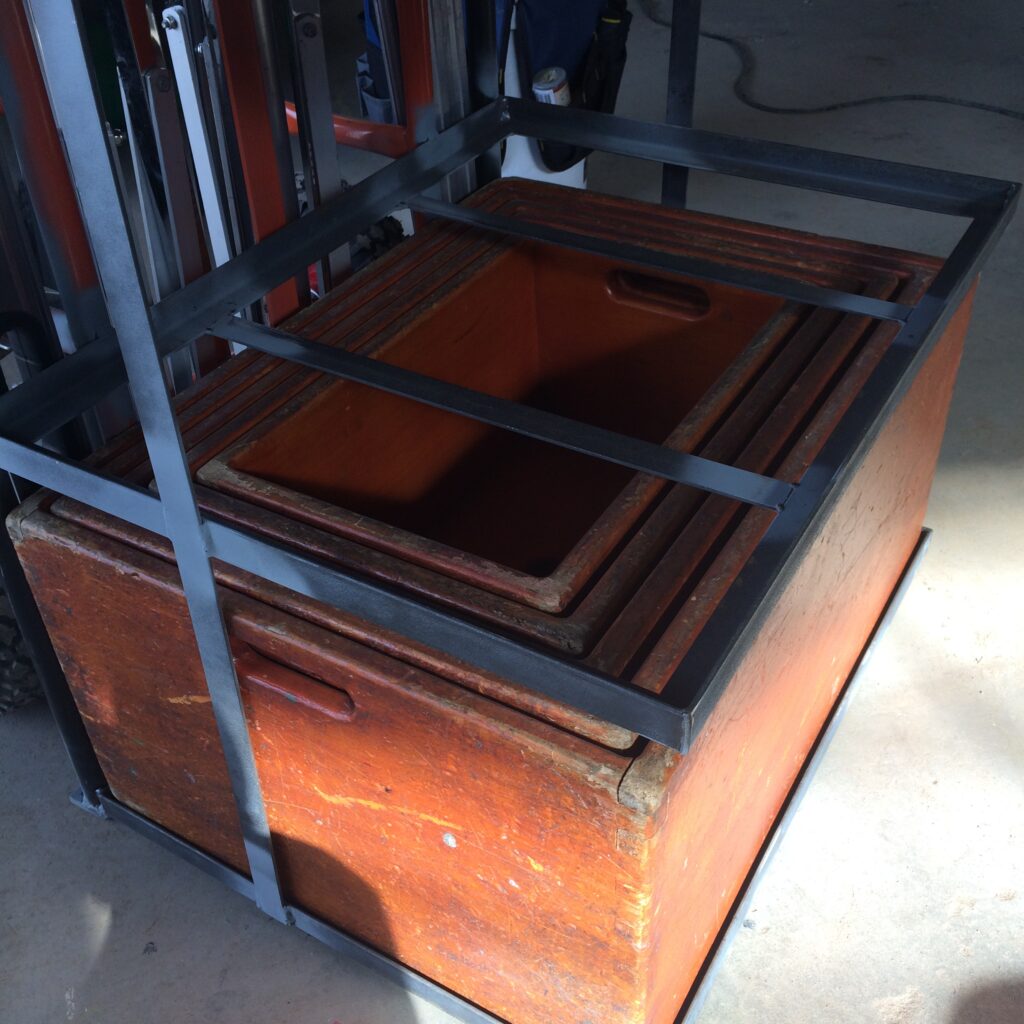
I built a set of these back in the day. I now prefer the nesting apple boxes. I can carry two full Australian applebox sets in the space required for a single US applebox set. Here’s what the Aussie appleboxes look like nested.

Anyway, Baseline Digital’s website is no more, so I’ve got an archive of the page reproduced here. Orginally posted Sep 2, 2008 at www.basslinedigital.com/tutorials/diy-appleboxes/

Webb and Sharon Pickersgill owned Bassline Digital, LLC in Pheonix Arizona. They graciously shared these designs at the time. If anybody knows them or has an update please comment below.

The figures referenced below are also in the PDF. Remember the prices are from 14 years ago.

Webb & Sharon Pickersgill owned Baseline Digital LLC in Phoenix Arizone

DIY Appleboxes

Posted on Sep 2, 2008

(Thanks to Emerson S. for compiling the PDF Instructions!)

These simple little boxes are a necessity for any studio, location or set. Incredibly handy for propping, sitting, elevating equipment, leveling, and a ton of other things. These things are the Ginsu Knives of the production world! They come in 4 standard sizes:

  • Length and Width are always 20″x12″ respectively.
  • Full = 8″ tall
  • Half = 4″ tall
  • Quarter = 2″ tall
  • Eighth (aka Pancake) = 1″ tall
DIY Apple Boxes

Safety First

Please be sure to wear eye and hearing protection. Use common sense! If you are not comfortable with any part of the tutorial, please ask someone who knows what they are doing to help you.

The Materials

The material list for these things is incredibly simple:

  • 4′x4′ 3/4″ Plywood (For sides and support) ~ $25
  • 4′x4′ 1/2″ Plywood (For tops and bottoms) ~ $20
  • 5/16″ wood dowels (Or screws if you choose) ~ $8
  • Wood Glue ~ $2
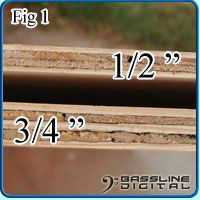
1/2" and 3/4" plywood thickness
1/2″ and 3/4″ plywood

The Cutting List

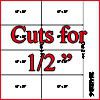
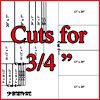
I needed 2 extra pancakes which will be cut from the 3/4″ wood and will be slightly thicker than standard pancakes. So this layout makes the most use out of the wood for my purposes. You may choose to alter the cuts to better use the wood for your project. Click the thumbnails to download the cuts to be made on the 4′x4′ wood.

Cuts on the 1/2″ 4′x4′ Piece

  • Measure in 20″ from one side and scribe across the entire piece. Make Cut #1.
  • Measuring from the cut edge, measure in another 20″ and scribe across the entire piece again. Make Cut #2.
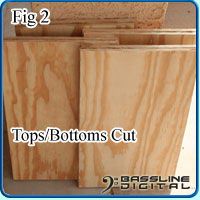
  • Now, adjusting for 12″ pieces** cut these 48″x20″ strips into 8 12″x20″. (Fig 2) These are the tops/bottoms of your boxes.
Figure 2 Tops/bottoms cut

** You have a choice on how to cut these. Since the board is slightly shorter than 48″, and the cuts you make actually take away wood, your pieces will be slightly shorter than 12″ each. You can adjust for this anyway you like. Either make each piece 11 15/16″, or perhaps make all pieces 12″ and your pancakes 11 3/4″, your choice.

Cuts on the 3/4″ 4′x4′ Piece

  • Just like we did on the 1/2″ piece, measure in 20″ from one side and scribe across the entire piece. Make Cut #1. These will become your extra Pancakes, if you want them.
  • On the remaining piece, measure down 20″ and scribe across. Make Cut #2. This will become the sides.
  • On the remaining piece, measure down 10 1/2″ and scribe across. Make Cut #3. This will become the front/back/support for the full box.
  • Measure down another 10 1/2″ and scribe across. Make Cut #4. This will become the front/back/support for the half and quarter boxes.
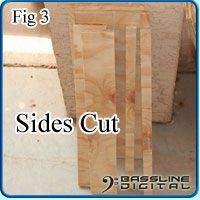
  • Go back to your “sides” piece and begin cutting your 2 1″ strip from it. Then cut your 3″ strips, then finally your 7″ strips. You should now have your sides done (Fig 3)
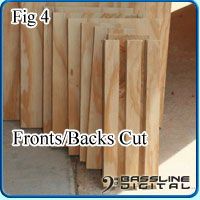
  • Now go back to your “front/back” pieces, and cut those pieces out as well. You should now have your fronts, backs, and supports done. (Fig 4)
Figure 3 sides cut
Figure 3 sides cut
Figure 4 Fronts/backs cut

Cutting Handles (Full and Half Apple Boxes)

  • For the full apple box, measure in 1 1/2″ from top and bottom, then 3″ in from each side.
  • The intersection of these measurements will create 4 marks.
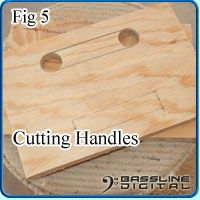
  • Drill a 1″ hole at each of those 4 marks. (Fig 5)
  • Using a reciprocating saw, cut between the 2 holes to form handle openings.
  • For the half apple box, you’ll only need one opening. You’ll still measure 1 1/2″ (Exactly half of the 3″ height), and 3″ on each side.
  • For the quarter apple box, use a 3/4″ drill bit and drill the holes after the boxes are assembled for more stability.
Figure 5 cutting handles

Assembly Of Sides and Supports

  • Take all of your cut pieces and dry-fit them together to be sure everything is the right size.
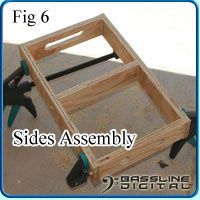
  • Clamp them together dry, and drill 5/16″ holes for your dowels. (Fig 6)
  • (Yeah yeah, when I took this picture my saw blade had broken so I hadn’t finished cutting the second handle and I was to excited to wait.. so I glued it together and sawed the hole later. 
  • Dry-fit all your dowels to be sure they all line up correctly.
  • Glue all dowels and all wood-to-wood surfaces. Clamp in place and allow to dry for at least one hour. (See drying times on your choice of wood glue)
  • Repeat this for your Full, Half and Quarter Apple Boxes.
Figure 6 sides assembly

Assembly of Tops/Bottoms

  • Put the tops and bottoms on your boxes and dry-clamp them in place.
  • Drill 5/16″ holes around the perimeter of the top for your dowels, dry-fitting your dowels as you go.
  • Drill one hole into the center of the top that will go into the center support.
  • I put a total of 11 dowels in the top. 2 on the front and back, 3 along each side, and one in the middle.
  • Repeat for the bottom.
  • Once everything is drilled and dry fit together, start glueing everything!
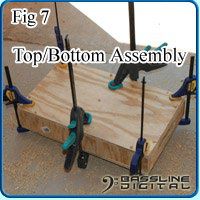
  • When you’re done, clamp everthing tight and let it dry. (Fig 7)
Figure 7 Top/bottom assembly

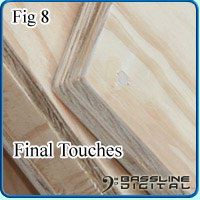
Final Touches

  • Saw off and/or sand down the dowels so that they are flush with the surface.
  • Sand the hard edges so that they have a nice smooth semi-rounded edge to them.
  • Take a sander to all of your completed boxes to get a nice spliter-less finish to them. (Fig 8)
  • Optionally, you can use a 1/4″ round router bit to round out the inside of the handles.
  • Optionally, you can prime and paint your boxes to give them a nice non-glare matte black finish.
Figure 8 Final touches

All DONE!

That’s it. I hope you enjoyed this quick tutorial. If you have any comments or questions, please feel free to Contact Us.

Safety on Set

Here are overlooked budget items or crew positions every PM or Producer should consider and justify in writing why they don’t hire suitably qualified people for the roles.

Safety Report

During pre-production get a safety report prepared in accordance with at least the current recommended Film and TV Safety Code and up-to-date Work Health and Safety (WHS) legislation and regulations.

The current agreed code for Australia is from 1983 because SPA and the MEAA can’t agree on anything. However, SafeWork Australia and the state equivalents are enforcing updated WHS rules so nobody has any excuse to use 40-year-old pre-digital safety guidelines.

In some jurisdictions, all the Producers and the Director can be criminally liable for WHS breaches, as well as company directors of production entities.

The Safety Report should be prepared by an accredited Safety Consultant/Supervisor.

Safety Consultant/Supervisor

A person suitably graded, qualified and skilled to provide specialist knowledge, expertise and advice regarding the most appropriate measures to minimize risks associated with the production.

Media Entertainment & Arts Alliance – National Stunt Grading Procedure – September 2010

There should also be an on-set Safety Supervisor if you have more than a handful of crew. A Safety Supervisor accreditation requires a minimum of 8 years (with 200-500 on-set days) or 6 years (with 400-800 on-set days). Producers should never hire a PA to fill in as a on-set Safety Supervisor.

They notice things. Things others don’t see. Things that can get cast, crew, or the general public, injured or killed.

Hire them, trust them, do what they say.

COVID Supervisor

The pandemic is still fresh but a PA can not and must never fill in as a COVID Supervisor. COVID Supervisors need enough on-set experience to navigate the chain of command and understand what (and how) the crew is shooting on the day. They must also have some level of infectious disease control training and experience.

It takes experience and confidence to tell your executive producer, director or A-List talent (or worse their “people”) that they must mask correctly, maintain distance and have them happily comply and cooperate. If the crew aren’t properly managed, you’ll get bad press and Tom Cruise-like rants

That’s just the visible tip of the job. Plus coordinate tests and results, work-zones, state and insurance compliance, stay-at-home orders. I’ve yet to hear of a single production that had an uneventful, COVID-compliant shoot. Crew don’t just show up tested and ready to work and follow the rapidly changing rules without it being someone’s job to inform, instruct and monitor them.

Nurse/Paramedic

The odds of an accident approach increase by the square of the number of people on a location. Once your cast & crew size is more than 50 people, you will probably get a trip, sprain, burn, cut or scrape.

Hire someone whose job it is to prevent injuries and treat inevitable mishaps. Your insurance and film permit probably requires it. Your WHS legal obligation definitely requires it even when not spelled out.

Traffic Controllers

Your experienced Location Manager will know all about this, but if you’re reading this far down chances are you have a new LM or haven’t made that hire yet.

Film crews expect to own the space they are working in. This comes from experience working in studios where they don’t have to share. Once on location, their reticular activating system doesn’t kick in to remind them they will be hit by a neighbour’s car. I’ve seen smart and experienced film crew step in front of a moving garbage truck because they’re focused on moving a c-stand or cutter.

Your Traffic Control Team not only lockdown the road for your shot, they also stop traffic (for up to 3 minutes) while your trucks park up, gear gets moved across a street, crew unload or pack-down, and a hundred other things throughout your shooting day. It is their job to keep you and your crew safe while they work on or near a road.

Your council film permit may specify the use of Authorised Traffic Controller, or you may even need to submit a Traffic Control Plan/Traffic Guidance Scheme with your permit application.

Bonus: Safety Briefings

At main Crew Call of every shooting day the 1st AD must include a safety briefing and if any crew members are not present they should be specifically briefed by their HoD, the 1st or the 3rd AD. Pick one and stick to it.

Document safety briefing attendance!

This especially includes hair & makeup artists, pre-light, pre-rig, pre-call and unit who are left out of morning briefings because they are at the unit base, in a trailer, or away from set. If they are not at the on-set briefing you still need to ensure they get a daily safety briefing.

Pro Tip: It’s like the aircraft take-off safety demonstration. No matter how many times you’ve seen it, you’ll be glad you paid attention if they ditch 3 minutes into the flight.

Have I left anyone or anything off? Comment below.

CNC 3018 Pro Router

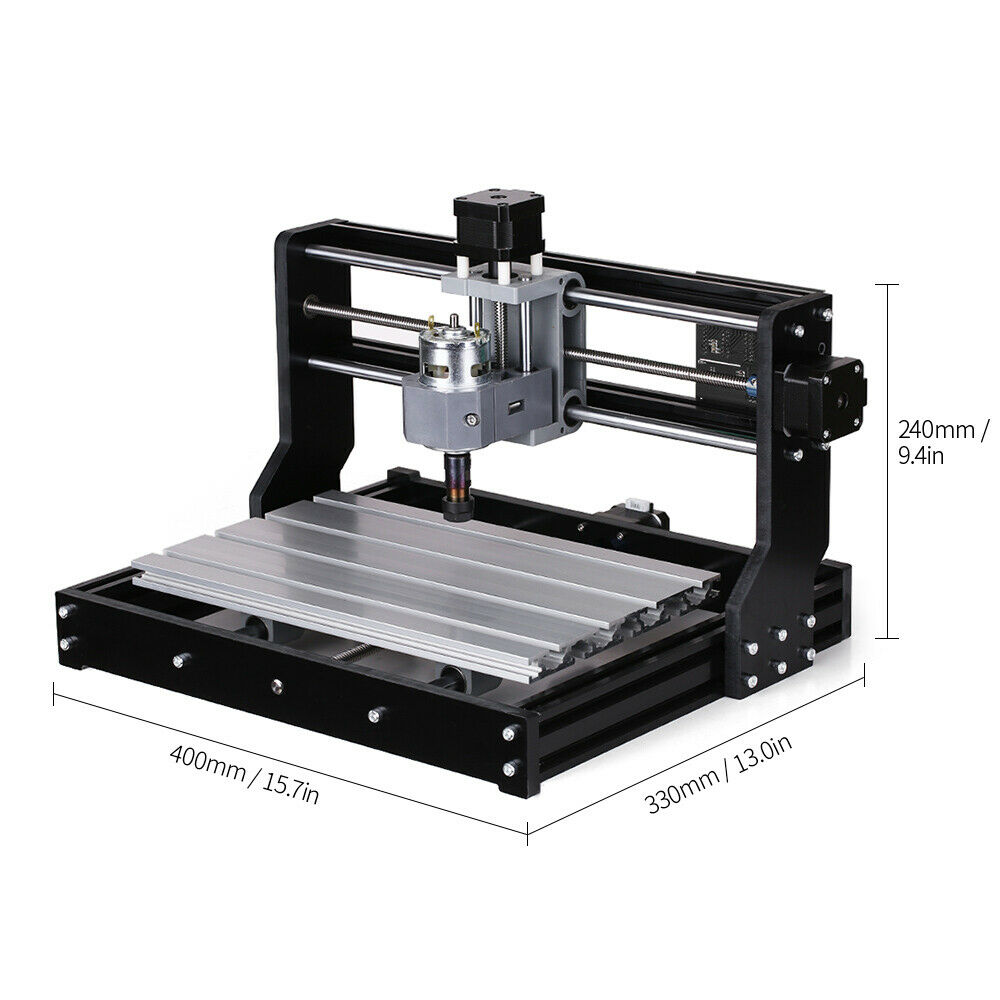
CNC 3018 Pro router photo

I’ve got a few DIY projects, particularly some filmmaking gear. So I bought this cheap 3018 CNC Pro Router off eBay for AUD $233.22. This is sold under a number of different names but the model number is always mentioned.

I did some research before I bought it. Don’t let the Pro in the title fool you. This is definitely only a hobby level, beginners, tabletop CNC router.

I also considered buying a 3D printer, when I realised that my friend BigOz Productions has had one for over a year and I’ve printed nothing in that time.

I also know a few maker-spaces where I could get something printed if I needed it. Again, nothing grabbed me enough to rush out and make. Of course the thought of being able to make something whenever I want is more attractive than the actual projects I’ve considered 3D-printing.

So a CNC 3018 Pro engraver/router? That’s different. I have an immediate list of four projects to start with. Unfortunately two of those require aluminium parts and this machine is definitely not suited to milling aluminium out-of-the-box. I’ll need to spend about the same money as I paid for it on modifications before it can reliably cut aluminium. That said a bigger, more expensive CNC router to cut aluminium would probably set me back about $1,000 and I’m not willing to go there… yet.

Plus the learning curve of CNC milling/routing/fabrication means it would be cheaper to get that all fabricated by someone else. But what else would I do with my down time during all this social isolation? Write a screenplay? Yeah, sure!

The production space on this little desktop CNC router is 300mm x 180mm x 45mm so it’s not great for large projects. I’ll send anything bigger out to a fabricator.

Seriously though, as a producer, my initial reaction most things is “Why not?” and “How can this work?”. That’s the case even for film projects I pass on. Saying no is a skill.

Enough philosophy!

I didn’t get the laser cutter which is the default with this model. I don’t intend to do much engraving which is what the laser seems best at. Plus the wooden parts I intend to make will be too charred if I laser cut them with the default laser. I could upgrade the laser for a beefier model, but if I do that I may as well get a very beefy laser, more powerful than the 5500W version most people get for it. I also don’t want to deal with the eye safety issues yet.

The router will be used to make some models for a horror feature I’m developing. Static models will be cut out of foam, then the later articulated versions will be wood. This project is what drove the decision to buy the CNC3018 router.

Next I’ve been wanting to make some jigsaw puzzles out of clear acrylic. If I can get a good edge and sufficient reproducibility, I’ve got a couple of wickedly difficult puzzles in mind.

Lastly I am a nerd and the idea of paying crazy prices for camera cages and mounting gear irritates me. Now if you’re mounting an expensive camera with an even more expensive lens make sure it’s something engineered for the job. Seriously pay the money to the professionals for the professional gear. But for experiments, and crazy ideas? Well that’s how most of the amazing innovations and inventions in grips and lighting and even camera came about.

I’ll use it scratch my own itch. I’ll add photos once it’s fully set up and I’ve run a project or two.

Modifications planned:

  • 400W replacement spindle (arrived).
  • End-stop switches (ordered)
  • Spoilboard build
  • Z-axis extension to 85mm
  • Supported rails on the gantry to stop X-axis and Z-axis flex.

April 2020 Sydney Sunrise & Sunset Times for Call Sheets

Call sheets often list First Light/Dawn, Sunrise, Sunset and Dusk/Last Light times. First/Last Light is normally Civil Twilight.

Best practice is to calculate them for your shooting location. I’ve provided Sydney for April 2020 below.

SYDNEY Lat=-33°52’00” Long=+151°12’00”
TIMES OF SUNRISE AND SUNSET (for ideal horizon & meteorological conditions)

AT Astronomic Twilight = Centre mass of Sun is 18° below the horizon. Light pollution prevents astronomy.
NT Nautical Twilight = Centre mass of Sun is 12° below the horizon. Horizon can normally be distinguished.
CT Civil Twilight = Centre mass of Sun is 6° below the horizon. Normally enough light to see without artificial light.
Transit Time when Sun is highest in the sky.

AT riseNT riseCT riseSunriseTransitSunsetCT setNT setAT set
2020-04-01054506140643070812591851191519442013
2020-04-02054606150643070812591849191419432012
2020-04-03054606150644070912581848191319422011
2020-04-04054706160645071012581847191219402009
2020-04-05044805170546061111581745181018391908
2020-04-06044805170546061111581744180918381907
2020-04-07044905180547061211571743180818371906
2020-04-08045005190548061311571741180618351904
2020-04-09045105200548061411571740180518341903
2020-04-10045105200549061411571739180418331902
2020-04-11045205210550061511561737180318321901
2020-04-12045305220551061611561736180118301859
2020-04-13045305220551061711561735180018291858
2020-04-14045405230552061711561734175918281857
2020-04-15045505240553061811551732175818271856
2020-04-16045505240553061911551731175718261855
2020-04-17045605250554062011551730175518241853
2020-04-18045705260555062011551729175418231852
2020-04-19045805260556062111541728175318221851
2020-04-20045805270556062211541727175218211850
2020-04-21045905280557062311541725175118201849
2020-04-22050005290558062311541724175018191848
2020-04-23050005290558062411541723174918181847
2020-04-24050105300559062511531722174818171846
2020-04-25050105310600062611531721174618161845
2020-04-26050205310601062611531720174518151844
2020-04-27050305320601062711531719174418141843
2020-04-28050305330602062811531718174318131842
2020-04-29050405330603062911531717174218121841
2020-04-30050505340603062911521716174118111840

Computed using National Mapping Division’s sunrisenset program, version 2.2
Licensed under the Creative Commons Attribution 3.0 Australia Licence. This data is provided without warranty of any kind including the implied warranty of merchantability. If you absolutely need accurate and reliable data you should be paying for someone to do this for you.

AT Astronomic Twilight = Centre mass of Sun is 18° below the horizon. Light pollution prevents astronomy.
NT Nautical Twilight = Centre mass of Sun is 12° below the horizon. Horizon can normally be distinguished.
CT Civil Twilight = Centre mass of Sun is 6° below the horizon. Normally enough light to see without artificial light.
Transit Time when Sun is highest in the sky.

Planning ahead? Here is 2020:

March 2020 Sydney Sunrise & Sunset Times for Call Sheets

Call sheets often list First Light/Dawn, Sunrise, Sunset and Dusk/Last Light times.

Best practice is to calculate them for your shooting location. I’ve provided Sydney for March 2020 below.

SYDNEY Lat=-33°52’00” Long=+151°12’00”
TIMES OF SUNRISE AND SUNSET (for ideal horizon & meteorological conditions)

AT Astronomic Twilight = Centre mass of Sun is 18° below the horizon. Light pollution prevents astronomy.
NT Nautical Twilight = Centre mass of Sun is 12° below the horizon. Horizon can normally be distinguished.
CT Civil Twilight = Centre mass of Sun is 6° below the horizon. Normally enough light to see without artificial light.
Transit Time when Sun is highest in the sky.

AT riseNT riseCT riseSunriseTransitSunsetCT setNT setAT set
2020-03-01051705480618064313081932195720272058
2020-03-02051805490619064413071930195620262056
2020-03-03051905500620064513071929195520242055
2020-03-04052005510621064613071928195320232054
2020-03-05052105520621064713071927195220222052
2020-03-06052205530622064713061925195120202051
2020-03-07052305540623064813061924194920192049
2020-03-08052405540624064913061923194820172048
2020-03-09052505550625065013061921194720162046
2020-03-10052605560626065113051920194520152045
2020-03-11052705570626065213051919194420132043
2020-03-12052805580627065213051918194320122042
2020-03-13052905590628065313051916194120112040
2020-03-14053006000629065413041915194020092039
2020-03-15053106000630065513041914193820082037
2020-03-16053206010631065513041912193720062036
2020-03-17053306020631065613041911193620052034
2020-03-18053306030632065713031909193420042033
2020-03-19053406040633065813031908193320022032
2020-03-20053506050634065913031907193220012030
2020-03-21053606050634065913021905193019592029
2020-03-22053706060635070013021904192919582027
2020-03-23053806070636070113021903192819572026
2020-03-24053906080637070213011901192619552024
2020-03-25053906090637070213011900192519542023
2020-03-26054006090638070313011859192419522022
2020-03-27054106100639070413011857192219512020
2020-03-28054206110640070513001856192119502019
2020-03-29054206120640070513001855191919482017
2020-03-30054306120641070613001853191819472016
2020-03-31054406130642070712591852191719462015

Computed using National Mapping Division’s sunrisunset program, version 2.2
Licensed under the Creative Commons Attribution 3.0 Australia Licence.

February 2020 Sydney Sunrise & Sunset Times for Call Sheets

Call sheets often list First Light/Dawn, Sunrise, Sunset and Dusk/Last Light times.

Best practice is to calculate them for your shooting location. I’ve provided Sydney for February 2020 below.

SYDNEY Lat=-33°52’00” Long=+151°12’00”
TIMES OF SUNRISE AND SUNSET (for ideal horizon & meteorological conditions)

AT Astronomic Twilight = Centre mass of Sun is 18° below the horizon. Light pollution prevents astronomy.
NT Nautical Twilight = Centre mass of Sun is 12° below the horizon. Horizon can normally be distinguished.
CT Civil Twilight = Centre mass of Sun is 6° below the horizon. Normally enough light to see without artificial light.
Transit Time when Sun is highest in the sky.

AT riseNT riseCT riseSunriseTransitSunsetCT setNT setAT set
2020-02-01044205160549061613092001202821012136
2020-02-02044305170550061713092000202821002135
2020-02-03044405190551061813092000202720592134
2020-02-04044605200552061913091959202620582132
2020-02-05044705210553062013091958202520572131
2020-02-06044805220554062113091957202420562130
2020-02-07045005230555062213091956202320552129
2020-02-08045105240556062313091956202220542128
2020-02-09045205260557062413091955202120532127
2020-02-10045305270558062513091954202020522125
2020-02-11045505280600062613091953201920512124
2020-02-12045605290601062713091952201820502123
2020-02-13045705300602062813091951201720492121
2020-02-14045905310603062913091950201620472120
2020-02-15050005320604063013091949201520462119
2020-02-16050105330605063113091948201420452118
2020-02-17050205350606063213091947201320442116
2020-02-18050305360607063313091946201220432115
2020-02-19050505370608063413091945201120412113
2020-02-20050605380609063413091944200920402112
2020-02-21050705390610063513091942200820392111
2020-02-22050805400610063613091941200720382109
2020-02-23050905410611063713091940200620362108
2020-02-24051105420612063813091939200520352106
2020-02-25051205430613063913081938200320342105
2020-02-26051305440614064013081937200220322104
2020-02-27051405450615064113081935200120312102
2020-02-28051505460616064213081934200020302101
2020-02-29051605470617064213081933195820282059

Computed using National Mapping Division’s sunrisunset program, version 2.2
Licensed under the Creative Commons Attribution 3.0 Australia Licence.

January 2020 Sydney Sunrise & Sunset Times for Call Sheets

Call sheets often list First Light/Dawn, Sunrise, Sunset and Dusk/Last Light times. First/Last Light is normally Civil Twilight.

Best practice is to calculate them for your shooting location. I’ve provided Sydney for January 2020 below.

SYDNEY Lat=-33°52’00” Long=+151°12’00”
TIMES OF SUNRISE AND SUNSET (for ideal horizon & meteorological conditions)

AT Astronomic Twilight = Centre mass of Sun is 18° below the horizon. Light pollution prevents astronomy.
NT Nautical Twilight = Centre mass of Sun is 12° below the horizon. Horizon can normally be distinguished.
CT Civil Twilight = Centre mass of Sun is 6° below the horizon. Normally enough light to see without artificial light.
Transit Time when Sun is highest in the sky.

AT riseNT riseCT riseSunriseTransitSunsetCT setNT setAT set
2020-01-01040404430518054712582009203821142153
2020-01-02040504440519054812592009203821142153
2020-01-03040604440520054912592010203921142153
2020-01-04040704450521055013002010203921142153
2020-01-05040804460522055113002010203921142153
2020-01-06040904470523055113012010203921142153
2020-01-07041004480523055213012010203921142152
2020-01-08041104490524055313022010203921142152
2020-01-09041204500525055413022010203921142152
2020-01-10041304510526055513022010203921142152
2020-01-11041404520527055613032010203821132151
2020-01-12041504530528055713032010203821132151
2020-01-13041704540529055713042010203821132151
2020-01-14041804550530055813042009203821132150
2020-01-15041904560531055913042009203821122150
2020-01-16042004580532060013052009203721122149
2020-01-17042204590533060113052009203721112148
2020-01-18042305000534060213052008203721112148
2020-01-19042405010535060313062008203621102147
2020-01-20042505020536060413062008203621102146
2020-01-21042705030537060513062007203521092146
2020-01-22042805040538060613072007203521092145
2020-01-23042905060539060713072006203421082144
2020-01-24043105070540060813072006203421072143
2020-01-25043205080541060913072005203321072142
2020-01-26043305090543061013082005203321062142
2020-01-27043505100544061113082004203221052141
2020-01-28043605110545061213082004203121042140
2020-01-29043805130546061313082003203121042139
2020-01-30043905140547061413082003203021032138
2020-01-31044005150548061513082002202921022137

Computed using National Mapping Division’s sunrisenset program, version 2.2
Licensed under the Creative Commons Attribution 3.0 Australia Licence.